AUTOSCALING WITH KUBERNETES

Autoscaling with Kubernetes
Autoscaling with Kubernetes

Customers using Kubernetes respond to end user requests swiftly and ship software faster than ever before. But what happens when the user builds a service that is even more popular than planned for, and run out of compute? In Kubernetes 1.3, we are proud to announce that we have a solution: autoscaling. On Google Compute Engine (GCE) and Google Container Engine (GKE) and on AWS, Kubernetes will automatically scale up the cluster as soon as user need it, and scale it back down to save money when the user doesn’t need. Let us explore this article and know more about autoscaling in Kubernetes.

WHAT TO SCALE?

In the context of Kubernetes cluster, there are typically two things one want to scale as a user:

Pods: For a given application let’s say you are running X replicas, if more requests come then the group of X pods can handle, it is a good idea to scale to more than X replicas for that application. For this to work faultlessly, the nodes should have enough available resources so that those extra pods can be scheduled and executed successfully.

Nodes: Capacity of all nodes putting together characterizes cluster’s capacity. If the workload demand goes beyond this capacity, then the user would have to add nodes to the cluster and make sure the workload can be scheduled and executed effectively. If the PODs keep scaling, at some point the resources that nodes have available will run out and the user will have to add more nodes to increase overall resources available at the cluster level.

When to Scale?

The choice of when to scale has two parts, one is measuring a certain metric continuously and when the metric crosses a threshold value, then acting on it by scaling a certain resource. For instance, if the user wants to measure the average CPU consumption of their pods and then trigger a scale operation if the CPU consumption crosses 80%. But one metric does not fit all use cases and for different kind of applications, the metric might vary.

So far we only considered the scale-up part, but when the workload usage drops, there should be a way to scale down with poise and without affecting the existing requests being processed.

HOW TO SCALE?

In case of pods, simply changing the number of replicas in replication controller is enough. In case of nodes, there should be a way to call the cloud provider’s API, create a new instance and make it a part of the cluster, which is relatively non-trivial operation and may take more time comparatively.

KUBERNETES AUTOSCALING

With this understanding of autoscaling, let’s discuss about detailed implementation and technical details of Kubernetes autoscaling.

CLUSTER AUTOSCALER

Cluster autoscaler is used in Kubernetes to scale cluster specifically nodes dynamically. It watches the pods continuously and if it finds that a pod cannot be scheduled, then based on the PodCondition, it chooses to scale up. This is far more effective than looking at the CPU percentage of nodes in aggregate. Since a node creation can take up to a minute or more depending on the cloud provider and other factors, it may take some time till the pod can be scheduled. Within a cluster, the user might have multiple node pools. Also, the nodes can be spread across AZs in a region and how the user scale might vary based on topology. Cluster Autoscaler provides various flags and ways to pull the node scaling behaviour.

For scaling down, it looks at average utilization on that node, but there are other factors which come into play. For instance, if a pod with pod disruption budget is running on a node which cannot be re-scheduled then the node cannot be removed from the cluster. Cluster autoscaler provides a way to terminate nodes and gives up to 10 minutes for pods to reposition.

HORIZONTAL POD AUTOSCALER

Horizontal pod autoscaler (HPA) is a control loop which viewpoints and scales a pod in the deployment. This can be done by creating an HPA object that refers to a deployment controller. The user can also define the threshold and minimum and maximum scale to which the deployment should scale. The original version of HPA which is GA (autoscaling/v1) only supports CPU as a metric that can be monitored. The current version of HPA which is in beta supports memory and other custom metrics. Once the user creates an HPA object and it is able to query the metrics for that pod, the user can see it reporting the details:

$ kubectl get hpa

NAME REFERENCE TARGETS MINPODS MAXPODS REPLICAS AGE

helloetst-ownay28d Deployment/helloetst-ownay28d 8% / 60% 1 4 1 23h

AMAZON MOBILE HUB

Amazon Mobile Hub

Amazon Mobile Hub is a mobile service, which lets you to build, test, and monitor usage of mobile apps swiftly with no trouble. It permits the users to integrate various AWS services to user’s mobile application in matter of some clicks. Once the app is ready, Mobile Hub allows the user to test the app on real devices as well as make use of analytics to track usage of the app.

Mobile Hub also allows users to focus more on the application building rather than oncentrating on the infrastructure build.

AWS Mobile Hub comprises a variety of tools, including tools to track application analytics, manage end-user access and storage, set up push notifications, deliver content, and build back-end services.

Another major advantage about Mobile Hub is that there is no limit to the number of projects the user can do with it. The pricing is also as per the pay-as-you-go scenario. Some of the global corporations that use Mobile Hub include, Bustle, Netflix, Yelp, HP, Etsy, Earth Networks, HTC, and Ticketmaster.

HOW IT WORKS

CREATING AN APP

To start using AWS Mobile, the user can go ahead with their own app or browser through Amazon AWS starter kits and select a fully functional app with pre-configured backend and front end.

SET UP THE BACKEND

AWS Mobile Hub acts as the reliable platform where the user can configure AWS services. Information about all the services will be saved in a cloud configuration file in the backend.

CONNECT TO THE BACKEND

AWS Mobile SDK lets you access all the AWS services you need. Configure the SDK in your app with the help of the information in the cloud configuration file. The user can start a new project in AWS Mobile Hub and select the features provided within the integrated console.

Then the user can choose the destination platform, iOS or Android, and add additional information such as device tokens, registration IDs, create API keys to understand and recognize the user or application.

If needed, the user can also add the cloud logic. This would help when the user need to call the cloud functions from the mobile app directly. Cloud functions can also be created to connect the app to several other software resources. By configuring Amazon API gateway and AWS Lambda, it is possible to execute cloud functions.

Select and configure all the features needed to build the app, and then start with the project. Once the Mobile Hub is activated, it generates a source package that can be downloaded and used.

The app that is built with the Mobile Hub can be used as a starter app, and more updates and modifications can be made from there.

AWS Mobile Hub help the developers to easily build B2C, B2E, and B2B mobile apps. Some of the features required for enterprise apps in specific include agility, security, scalability, ease in developing and deploying, identity management, user engagement, and insights.

THE VERDICT

Mobile app development for organizations can be a complex task, but this can be simplified with the help of AWS Mobile Hub. The entire process of building, testing, and monitoring applications can be flattened out with the combination of Cognito, Device Farm, Lambda, and other major services.

Now the entire organization workforce can complete their tasks through their mobile devices and elude all the complex steps they had to endure earlier, and this includes reduced coding.

WHAT IS DYNATRACE AND HOW DOES IT WORK?

What is Dynatrace and how does it work?

Dynatrace is one of the APM tool which meant for collecting application performance metrics and extend its capability to monitor at an instance level.

To elaborate with an example, consider you developed one web application (application could be of any type, this is just for example), and you want to know how my application’s health is – like how much time is taken for one click “submit” button from user interface.

Apart from giving you full response time of a transaction (if properly configured) but would also give you at code level (diagnostic) which method is consuming more time in processing the request.

Adding to above, you can set thresholds and instruct it to send you mail (or create tickets) and inform you if something goes beyond the normal.

How does it work?

Dynatrace server should be installed on your system and it consists of host and agent . It has a dashboard

through which we can diagnose our system on one place.

Our server can easily interact with other agent if we want , for that we have to run some command through terminal and then we can easily watch the user interaction and also we can customize the time.

Benefits of Dyntrace

For Testing you should have lot of data and through which you can check your system health such as CPU, Memory, Disk and Network Utilization,Storage Problems

We can also look into the problem which are captured in dynatrace and then we can resolve those.

With the help of Dynatrace, developers and testers can ensure that their application works fast and is reliable.

We can capture the issues before client complains about the same.

HOW CAN WE EMBED TWO OR MORE COMPONENTS INTO ONE IN REACT?

How can we embed two or more components into one in React?

We can embed components into one in the following way:

1 class MyComponent extends React.Component{

2 render(){

3 return(

4 <div>

5 <h1>Hello</h1>

6 <Header/>

7 </div>

8 );

9 }

10 }

11 class Header extends React.Component{

12 render(){

13 return <h1>Header Component</h1>

14 };

15 }

16 ReactDOM.render(

17 <MyComponent/>, document.getElementById(‘content’)

18 );

WHY DO WE NEED A REACT ROUTER?

Why Do We Need A React Router?

Having a single page application limited to single view does not do justice to many popular social media websites like Facebook, Instagram which render multiple views using React today. We need to move ahead and learn how to display multiple views in our single page application.

For example, we are used to seeing a home page which displays welcome message and related content. The site’s background details can be found on the ‘About Us’ page, a list of users and their details are listed on a different page and there might be various other pages to include several different views.

SSL CERTIFICATE: WHAT USER NEEDS TO KNOW

Ssl certificate: what user needs to know

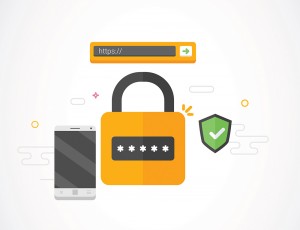
SSL Certificates are mini data files that digitally bind a cryptographic key to an organization’s details. When installed on a web server, it actuates the padlock and the https protocol allows secure connections from a web server to a browser. SSL is used to secure credit card transactions, data transfer, and logins, and in recent times it is becoming the standard when securing browsing of social media sites.

Ssl certificate

An organization needs to install the SSL Certificate onto its web server to initiate a safe session with browsers. Once a secure connection is established, all web traffic between the web server and the web browser will be secure.

When a certificate is successfully installed on the user’s server, the application protocol also known as HTTP will change to HTTPs, where the ‘S’ stands for ‘secure’. Depending on the type of certificate purchased and what browser the user is surfing on the internet, a browser will show a padlock or green bar in the browser when the user visits a website that has an SSL Certificate installed.

HOW DOES AN SSL CERTIFICATE WORK?

SSL Certificates uses public key cryptography. This specific kind of cryptography harnesses the power of two keys which are long strings of randomly generated numbers. One is called a private key and one is called a public key. A public key is known to your server and available in the public domain. It can be used to encrypt any message. For instance, if Lisa is sending a message to Marley she will lock it with Marley’s public key but the only way, it can be decrypted is to unlock it with Marley’s private key. Marley is the only one who has his private key so Marley is the only one who can use this to unlock Lisa’s message. If a hacker interrupts the message before Marley unlocks it, all they will get is a cryptographic code that they cannot break, even with the influence of a computer.

Why The User Needs an SSL Certificate?

SSL Certificates protects user’s sensitive information such as credit card information, usernames, passwords etc. It also:

Keeps the user’s data safe and protected between the servers.
Increases User’s Google Rankings.
Increases customer trust.
WHERE DOES USER CAN BUY AN SSL CERTIFICATE?

SSL Certificates need to be issued from a trusted Certificate Authority. Browsers, operating systems, and mobile devices maintain a list of trusted CA root certificates.

The Root Certificate must be present on the end user’s machine in order for the Certificate to be trusted. If it is not trusted the browser will give untrusted error messages to the end user. In the case of e-commerce, such error messages result in immediate lack of confidence in the website and organizations risk losing confidence and business from the majority of consumers.

The browser and operating system vendors such as Microsoft, Mozilla, Opera, Blackberry, Java, etc., trust the legitimate Certificate Authority and that it can be relied on to issue trustworthy SSL Certificates.

CYBER SECURITY RISK IN AN INTERNET OF THINGS WORLD

Cyber Security Risk In An Internet Of Things World

Cyber Security Risk in an IoT

The IoT offers new ways for businesses to create value, however, the continuous connectivity and data sharing also creates different opportunities for information to be conceded. So, explore this article and know some of the more important developments in the battle to fight against cyber risks.

Cyber Security Risk in an IoT

What makes the Internet of Things (IoT) different from the traditional Internet? The IoT does not rely on human intervention to function. With the IoT, sensors collect, communicate, analyze, and act on information, offering new ways for technology and businesses to create value—whether that is creating completely new businesses and revenue streams or delivering a more effective experience for consumers.

But this also creates new opportunities for all the information to be compromised. Not just the data is being shared through the IoT, but more sensitive data is being shared. As a result, the risks are exponentially greater.

Many technologies, media, and telecom establishments are already handling these cyber risk challenges. Information technology security experts have been cautioning the public about cyber threats for years, using conferences to publicize new vulnerabilities in systems and software

THE MISSION OF SECURE IOT IS JUST A START

The Open Web Application Security Project’s (OWASP) Internet of Things Top Project aims to educate users on the main aspects of IoT security and help vendors make common appliances and gadgets network- and Internet-accessible.

These types of projects are just the foundation of the future security standards that must be developed to create a network of devices that aid users in a secure environment.

It seems that proficient hackers are everywhere, and their growing focus on the IoT is a natural progression since they are looking to where the world’s data is flowing. The interconnected world is coming, but so are its hackers.

In a few years, there could be a whole new class of things to worry about in the cyber security field. Hopefully, by then the users will have already taken care of the current problems they are facing in the smart IoT.